Alright, let’s cut to the chase—if you’re here, you either just uncrated a cement mixer that’s wobbly enough to spill a bucket before you even add water, or your current setup is making every pour a gamble. And since we’re the folks who supply these mixers (let’s keep that subtle, yeah?), we’ve seen our fair share of folks skip the leveling step and end up with concrete caked weirdly, or worse, their mixer tipping over mid-batch. Spoiler: leveling isn’t just a “nice-to-do”—it’s the whole reason your mixer works right. Let’s walk through this like we’re geeking out over a weekend project, no fancy engineering jargon, just real stuff we’ve helped customers nail. Cement Mixer
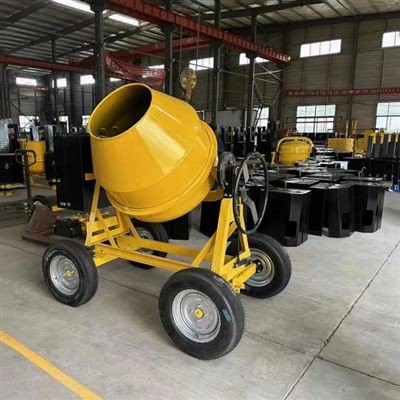
First off, why does leveling matter anyway? If your mixer’s tilted, the concrete batch won’t churn evenly. The blades will drag on one side, not pick up enough material, and you’ll have half-dry chunks or thick goop stuck to the interior. Plus, a wobbly mixer is a safety hazard—especially when that drum’s spinning heavy wet concrete. We’ve had a guy call us last month saying his mixer slid off a DIY stand and cracked a tile floor; that could’ve been avoided with 10 minutes of leveling.
Let’s start with the basics you actually need (no overbuying here): a long level (we recommend a 4-foot torpedo level—small ones for shelves are too flimsy), a pry bar, some heavy-duty shims (the thin plastic or metal ones, not the cardboard kind—those get crushed fast), and a tape measure. Pro tip: if you don’t have a level, grab a long straight board and a level bucket of water—set the board across the drum, and the water will settle to show the tilt, but don’t skip getting a real level if you can.
Now, where do you set the mixer first? Don’t just plop it on any patch of dirt. If you’re using it on a job site, pick an area that’s as flat as possible—no soft, boggy spots. If you’re on concrete, even concrete has tiny dips or high spots. If you’re storing it long-term, maybe a wooden pallet to keep it off damp ground, but for short-term projects, just a solid surface. Once you’ve picked the spot, give the mixer a minute to settle—if it’s on dirt, maybe a quick pat down to smooth it out.
Next, get that level on the drum. Here’s the trick: don’t just set the level on the frame. The drum is the part that spins, so we need it to be level, not the whole frame. So set your long level across the top edge of the drum, front to back first. If the bubble’s not dead center, that’s your tilt. Now, lift the low side of the mixer—careful, those things are heavy, even empty. Use the pry bar under the frame, right near the wheel or foot, to lift that low edge up. Once it’s slightly off the ground, slide a shim under the frame, between the metal and the ground. Start with a thin shim; you can always add another if you need more lift.
Wait, what about side-to-side? Yeah, we almost missed that. After you get front to back level, rotate the drum 90 degrees, and set the level across the side edge, left to right. Do the same thing—lift the low side, add a shim, check the bubble, adjust until it’s centered. Now, double-check both directions. This isn’t a one-and-done. Some folks add a shim to the front, then when they do side to side, they tilt it again, so you gotta cross-verify.
Here’s a pro move we pass along to all our customers when they pick up a mixer: after you get it level, give the drum a spin by hand (unplug it if it’s electric, or turn off the gas if it’s gas-powered). If it spins smoothly without any wobble, you’re golden. If it feels like it’s catching on something, that’s a sign it’s still not level, or maybe the blades are out of alignment—but leveling fixes 90% of the spin issues.
What if you’re on a super uneven surface, like a sloped backyard? Don’t try to force it with a million shims. Either build a small, level platform with concrete blocks (stack them evenly, check with your level as you go) or use a portable work stand made for mixers. We’ve seen folks try to stack cinder blocks haphazardly and end up with the mixer tipping—no thank you. A quick leveled platform is way safer.
Also, don’t forget about the weight of the mixer itself when it’s full. Wait a second—if you level it when it’s empty, will it stay level when you add 500 lbs of concrete? Yeah, usually, but on super slippery ground, maybe double-check after a test batch. Once you add the concrete, give it a spin and listen. If the motor’s straining, that’s a sign the drum’s not spinning freely because it’s tilted. Adjust the shims a tiny bit until the motor runs smooth.
Common mistakes we see all the time: using old cardboard for shims (it gets squished, so your level shifts mid-pour), only checking front to back and skipping side to side (that’s the #1 reason for uneven mixing), not taking the time to lift the mixer safely (straining your back isn’t worth it—ask a buddy to help if it’s heavy), and leveling it on grass that’s soft (the ground compresses over time, so you’ll have to re-level after the first batch).
Wait, how often do you need to re-level it? If you’re using it daily on a job site, maybe check it once a week, or after moving it. If it’s a home project mixer you use once a month, check it before each use. If you store it, make sure it’s level when you put it away so it doesn’t rust unevenly or get stuck with concrete in the wrong spot.
And a quick bonus tip: if your mixer has adjustable feet (some of ours do—we design a lot of our mixers with that feature to make leveling easier), don’t just crank the feet all the way. Adjust them incrementally, check the level as you go, so you don’t make it way too high. Adjustable feet are a game-changer for folks on concrete floors, like if you’re working in a garage.
Now, let’s get real—we know this sounds tedious, but it takes longer to spill concrete or chisel a wobbly mixer than it does to spend 15 minutes leveling it. We’ve had customers come back to us saying they skipped the step and had to throw away a whole batch because it didn’t mix right. That’s money down the drain, not to mention the hassle of cleaning up.
If you’re in the market for a new cement mixer (hey, we do those!), make sure you get one that’s built with quality—cheap mixers often have flimsy frames that warp, making leveling impossible. All our mixers are tested for stability, so you won’t have to fight a wonky frame just to get it level.
Now, if you’re dealing with a stubborn mixer that just won’t stay level, or you want to ask us about our line of mixers for your project, hit us up—we’re here to help. No pushy sales stuff, just real advice from people who know mixers inside and out. We’ve got electric ones for small jobs, gas-powered for big sites, and portable ones you can tow to any location.
Just to wrap this up, let’s recap the steps quick so you don’t forget: 1. Pick a solid, flat surface (or build a small platform if needed). 2. Grab your long level, pry bar, and shims. 3. Lift the low side of the mixer, add shims, check front-to-back level. 4. Rotate drum, check side-to-side level, adjust shims. 5. Spin the drum by hand to make sure it’s smooth. 6. Double-check after adding a test batch.

Leveling your cement mixer is like prepping a surface before you tile—skip it, and the whole job suffers. We’ve got your back if you need help, whether it’s tips like this or picking the right mixer for your needs.
Self Loading Concrete Mixer Truckr REFERENCES
- Concrete Construction Magazine. (2021). Proper Setup and Leveling of Mortar Mixers for Small Jobs.
- Occupational Safety and Health Administration (OSHA). (2019). Safety Guidelines for Portable Concrete Mixer Operation.
- American Society of Concrete Contractors (ASCC). (2022). Best Practices for Mixer Maintenance and Setup.
Shandong Fuxin Automobile Technology Co., Ltd.
We’re well-known as one of the leading cement mixer manufacturers and suppliers in China, featured by quality products and good price. Please rest assured to buy advanced cement mixer made in China here from our factory. Contact us for more details.
Address: West of Nanshou Road, Beihai Road, Weifang City, Shandong Province
E-mail: h17616861003@gmail.com
WebSite: https://www.fuxinautomobile.com/
